Print labels (Zebra integration)
Written By Max
Last updated 3 months ago
Step 1: Print with Zebra
Prints automatically when you click Save or Create another item like shown in this video. It’s faster as it skips the extra PDF step.
Before you start, make sure:
Use Google Chrome for best compatibility.
Use Mac & Windows computer since Zebra drivers are required.
Not supported on iPad/iPhone, you can still print via PDF with your Zebra printer.
Only works with label size: 2,25 x 1,25” (57mm x 32mm)
We recommend Zebra ZD 421 D as you can integrate it with your local network. You can also use other Zebra models that support ZPL.
Step 2: Set up your Zebra printer with your computer
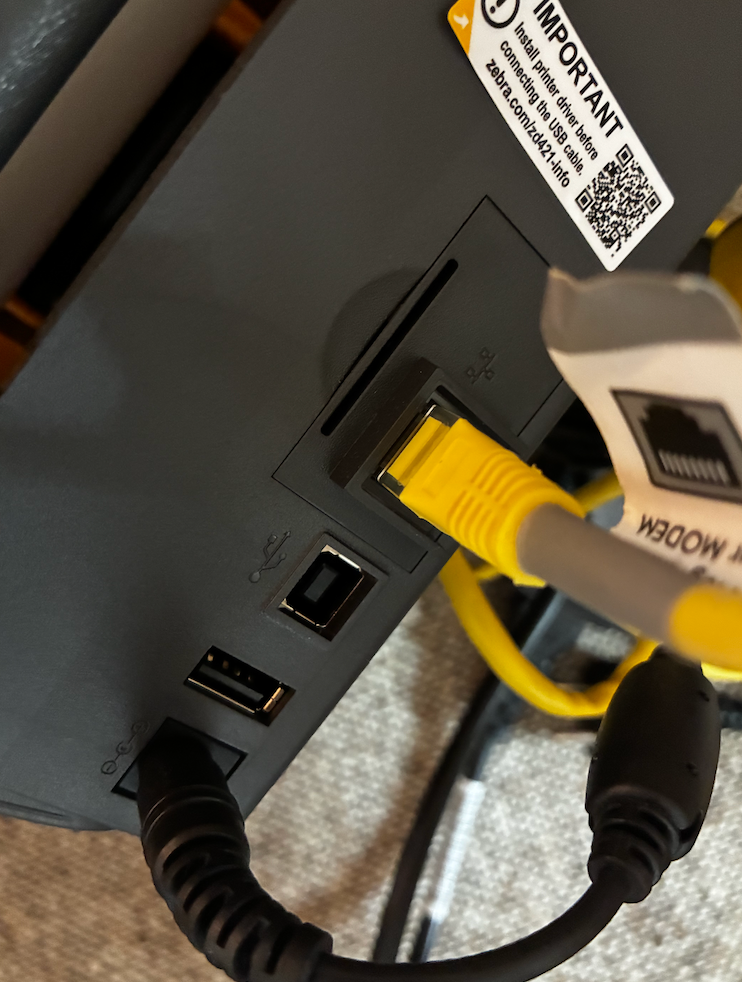
Connect your Zebra printer with your Wi-Fi router using this cable:
Go to Circle-Hand settings → device → enable
*This setting is per-device, so not synced through your account.Click here to install the “Zebra Browser Print” App.
Here is the user guide on how to install it and set it up.
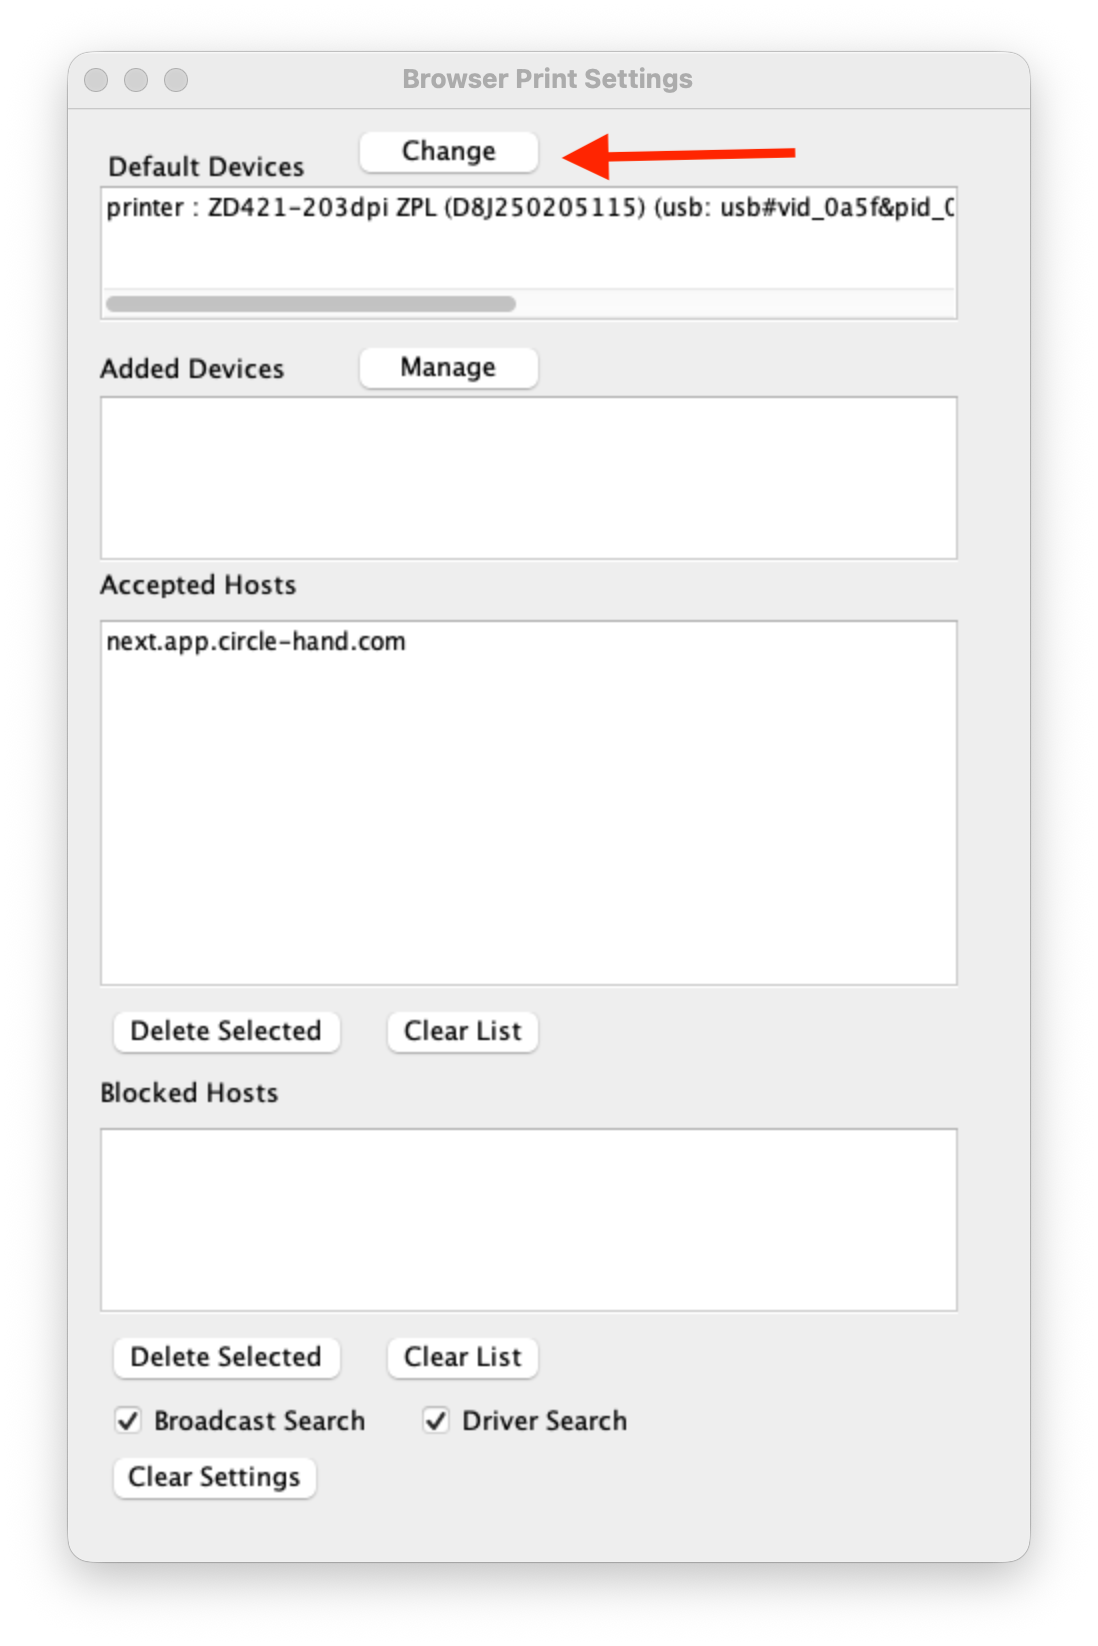
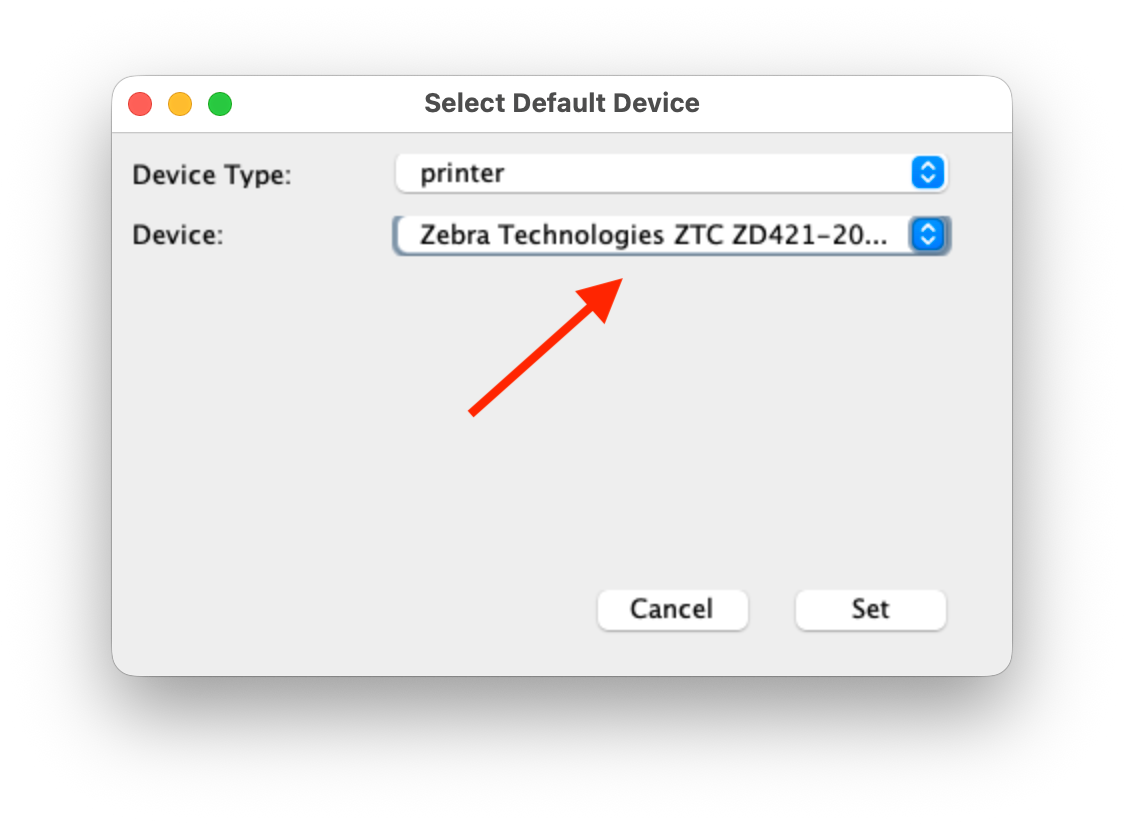
* It’s important that you set the printer you want to print from as the “Default Device”. This is explained on page 10. The program needs to always run in the background and the default device need to always be set to the correct printer for the printing to work.
Set up the Zebra label size on your phone as shown in the video:
Step 3: Most common Issues
If it doesn’t work, please make sure:
a - You use Google Chrome
b - You use Zebra via Wi-Fi (cable of Zebra must be plugged into Wi-Fi router, Bluetooth isn’t supported)
c - Go into browser print -> change -> select printer -> click set not cancel (even if you already did that in the past, even multiple times, it often loses connection on restarts etc.)
Was this helpful?
Still need help? Ask the team